
LRRSA Maps
Research Maps of Victorian Tramways
Well known and respected researcher and author Mike McCarthy is making his collection of personal research maps available for purchase as PDFs. The maps are designed to print at A3, but the quality is such they will print beautifully anywhere from A4 through to A1. When seen on a screen, as the maps use "vector" technology, they can be zoomed in to any percentage with losing any clarity.
Mike's aim in producing the maps was to show every known tramway in Victoria, however that is obviously an impossible task, given that (for example) some construction tramways only existed for a matter of months.
These are research maps, and represent the state of current knowledge; updates to released maps will occur from time to time as new facts come to light. Mike welcomes any suggested corrections and additions - his email address is present in the title block of each map. Check the current status of these maps.
Current plans are to release the maps periodically, in batches of ten, until the full collection is available.
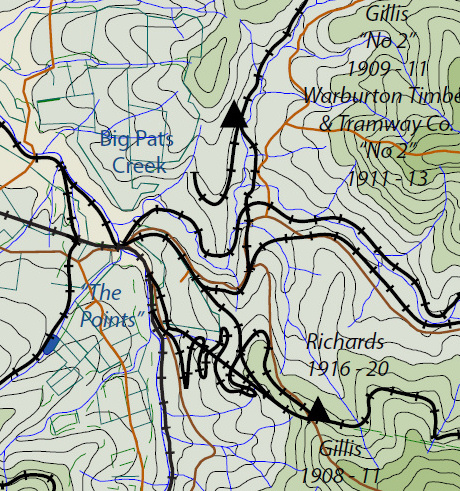
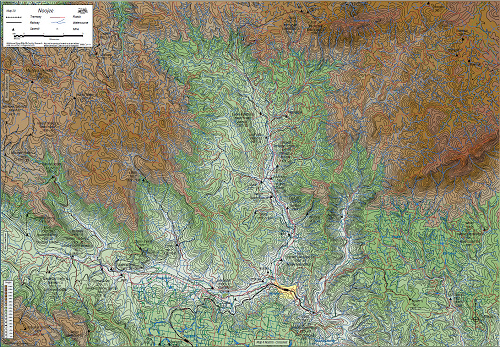
An example, zoomed up to 300%, is illustrated below.
The cost of each map has been set at $4.00. LRRSA members receive a 25% discount on the above price. The maps can only be purchased from the LRRSA Online shop.
Click here to go to the LRRSA Online shop
Overseas purchasers note: the prices quoted above include Australian Goods & Services Tax (GST) which amounts to one-eleventh of the price. This will be deducted on all export sales.
Currently Available Maps
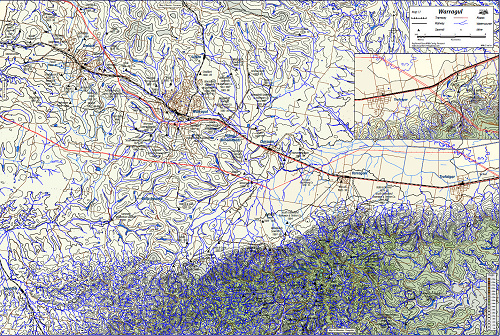
Map 1 - Warburton:

Mike McCarthy's personal map of the Warburton area, extending from near Yarra Junction in the west, to beyond Federal, Ezards and Richards mills to the east. To the south the map includes Gilderoy, and continues on to Powelltown on Map No. 2
Map 2 - Powelltown:
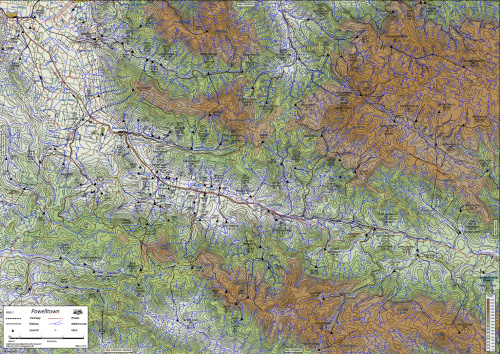
Map 2 of the series covers the Powelltown district. Overlapping Map No. 1, this map includes Yarra Junction and Britannia Creek to the north, and extends south to Slocumb & Walker's Mill at the Three Sisters. To the east, New Federal and Goodwood Mills are included. Other adjoining maps are No. 3 Gembrook-Tonimbuk and No. 15 Longwarry in a southerly direction, and Map No. 20 Noojee eastwards
Map 3 - Gembrook Tonimbuk:
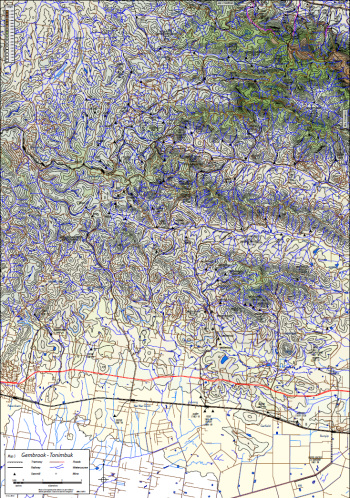
Map 3 of Mike McCarthy's map series covers the Gembrook-Tonimbuk districts. The northern edge overlaps Map No. 2 Powelltown, and the map extends south to Bunyip.
Map 4 - Neerim Crossover:
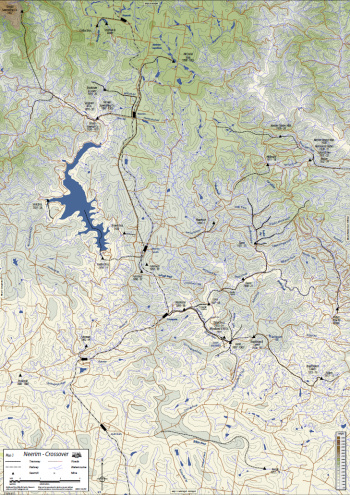
Map 4 covers the Crossover-Neerim-Nayook district of Gippsland. The map overlaps with Map 20 Noojee to the north, Map 8 Neerim East-Hill End to the east, Map 17 Warragul-Yarragon to the south, and Map 15 Longwarry to the west.
Map 5 - Erica Tyers:
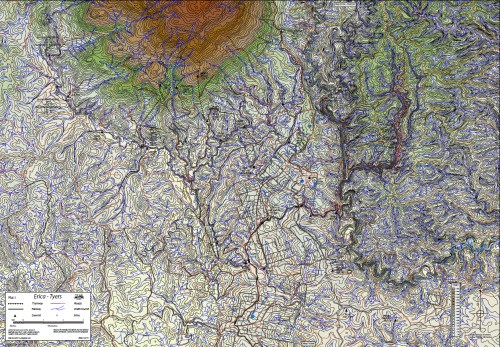
Map 5 of the series covers the Erica and Tyers districts, including Walhalla and the numerous firewood tramways serving the mines. The northern edge overlaps Map No. 6 Erica-Thomson, and adjoins Map 7 Gould to the south. Included are O'Shea & Bennett No 2, later Ezard No. 1 Mill to the north, and Monarch Sawmills to the south.
Map 6 - Erica Thomson:
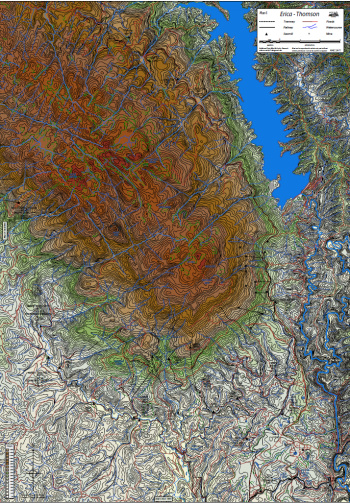
Map 6 covers the Erica-Thomson districts. This map overlaps Map No. 5 Erica-Tyers to the south, extending from Erica in the south to the Alstergren mill in the north. The western edge of the map overlaps Map No. 21 Tanjil Bren, while the Thomson River effectively is the eastern boundary of the map.
Map 7 - Gould:
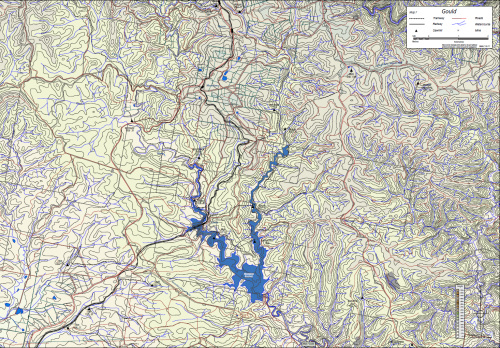
Map 7 of the series covers the Gould (Moondarra) district. The northern edge overlaps Map No. 5 Erica-Tyers (reaching Collins Siding), and the map extends south to the short-lived Elton mills.
Map 8 - Neerim East, Hill End:
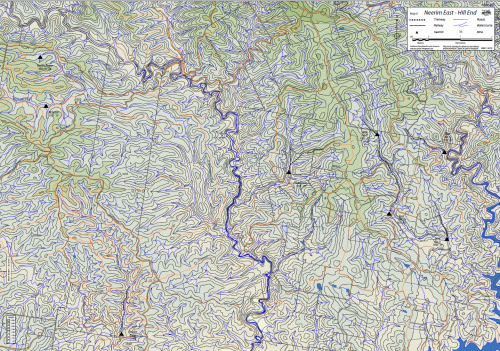
Map 8 covers the Neerim East and Hill End districts. This map overlaps Map No. 4 Neerim-Crossover to the west, and extends from Neerim Timber Mills in the north, down to Rouche Briggs in the south, and to the various Reed mills in the east.
Map 9 - Welshpool:
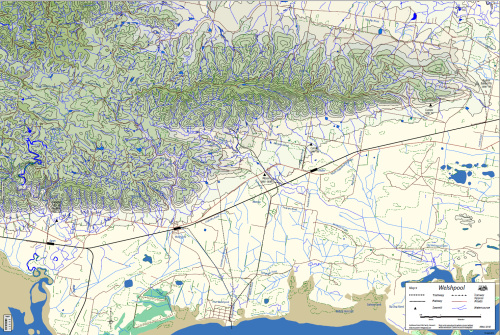
Map 9 of the series covers the Welshpool district. This map overlaps Map No. 10 Corner Inlet to the west, and extends from Port Welshpool in the south to the Buckly Ballast Pits in the east, and to Langlands or Buckley Mill,. north of Agnes, to the west. This map includes the route of the VR Port Welshpool 2ft 6in gauge horse-drawn tramway.
Map 10 - Corner Inlet:
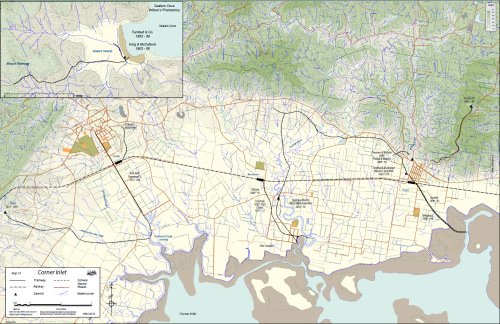
Map 10 covers the Corner Inlet area, with an inset map for the tramways into Sealers Cove, on Wilsons Promontory. This map overlaps Map No. 9 Welshpool to the east, extending from Anderson's Mill in the east, through Port Franklin and Foster to Davis Mill in the west, plus as mentioned the Sealers Cover tramways.
Map 11 - Wonthaggi:
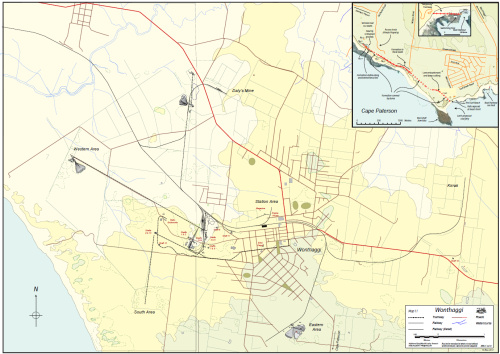
Map 11 covers the town of Wonthaggi and associated mines, with an inset showing Cape Paterson.
Map 12 - Mullungdung:
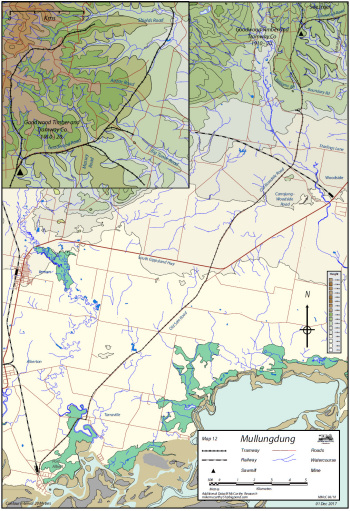
Map 12 covers the Mullungdung area, extending from Port Albert in the south to the location of the Goodwood Mill in the north.
Map 13 - Kinglake:
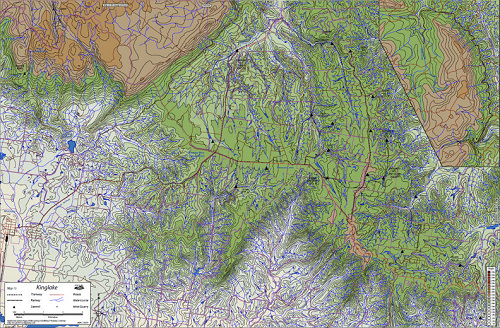
Map 13 covers the Kinglake area, extending from Whittlesea in the west, to beyond Harmsworth mills to the east. To the north the map includes Mount Disappointment and Flowerdale. Adjoining maps are Map No. 25 Mt Disappoiuntment to the north, and to the east Map No. 28, Toolangi and Healsville.
Map 14 - Tanjil Bren:
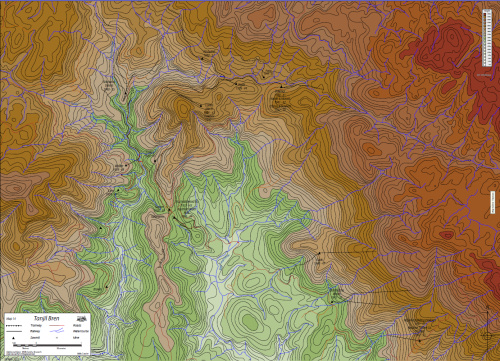
Map 14 covers the Tanjil Bren vicinity. This map borders map 6, Erica-Thomson, in an eastward direction.
Map 15 - Longwarry:
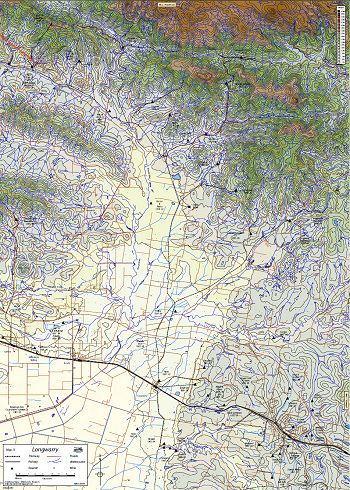
Map 15 covers the Longwarry area. This map shows a short distance south of the Gippsland railway between the stations of Garfield and Lardner Siding, to the east of Drouin. and extends north along the Bunyip River and tributaries, until it joins Map No. 2, Powelltown. To the east this map joins Map No. 17 - Warragul.
Map 16 - Allambee-Thorpdale:

Map 16, the map of the Allambee-Thorpdale district, extends from the Allambee area in the west to Thorpdale in the east, and south to beyond Allambee South. To the north the map adjoins Map No. 17, Warragul.
Map 17 - Warragul:
Map 17 covers the Warragul area, extending from near Drouin in the west, to beyond Trafalgar to the east. The southerly half of the pam extends from Topiram in the east to Allambee and Childers in the west. Adjoining maps are: South: Map 16 Allambee-Thorpdale; North: Map 4 Neerim-Crossover; East: Map 15 Longwarry.
Map 18 - Woori Yallock:
Map 18 covers the Woori Yallock area, extending from Killara in the west to Wesburn in the East, and from Panton Gap in the north to beyond Sharp's mills to the south. The map borders Map 3 Gembrook-Tonimbuk to the south, and Map 2 Powelltown to the east.
Map 19 - Westernport:

Map 19 covers the Westernport area, extending from San Remo in the west, easterly to beyond Ryanston, and from Archies Creek in the south to Grantville in the north. Included is a larger scale inset of the coal tramways near Kilcunda.
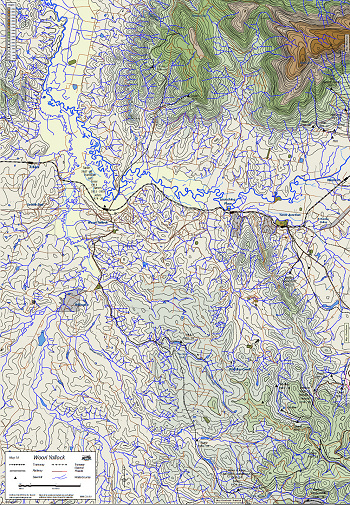
Map 20 - Noojee:
Map 20, the last of the currently available set, covers the Noojee area, extending from the Ada No. 2 mill and the New Ada in the west to beyond Noojee in the east, and including all of the tramways which fed into Noojee. The northernmost mills are Davis Nos. 1 and 2, while to the south the map includes Nayook and Neerim North. The map adjoins Map 1 Warburton to the north-west, Map 2 Powelltown to the south-west, and Map 4 Neerim-Crossover to the south.